
Export your journal to accounting software
Match accounts and clients, then download generic, QuickBooks or Sage/Acomba journals and export summaries.
- 1
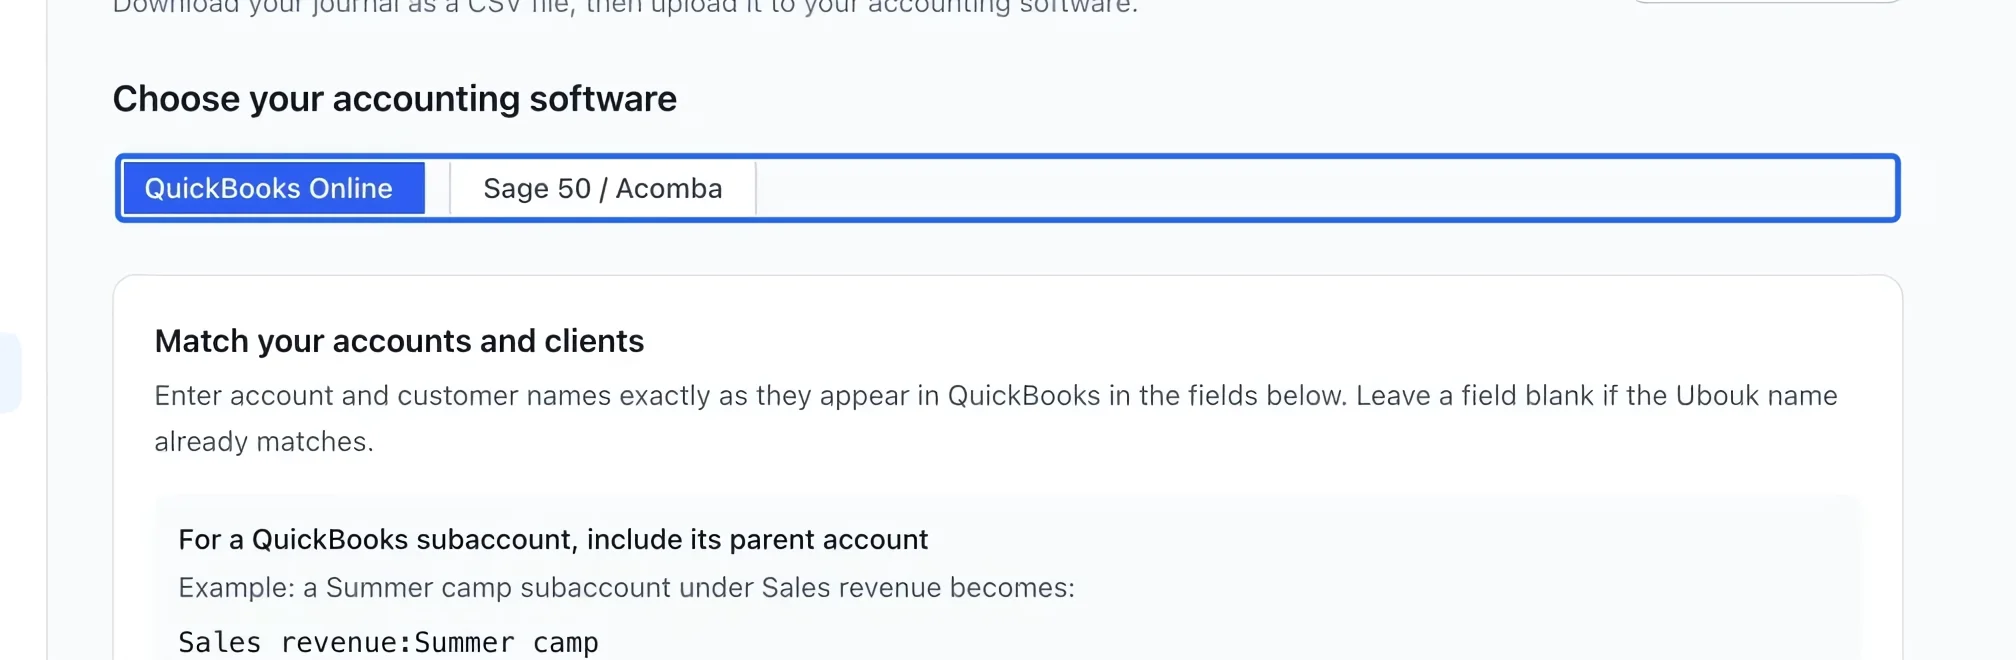
Choose the export format
Open Accounting exports, also linked below financial reports. Choose QuickBooks Online or Sage 50 / Acomba. This page downloads files for you to import; it does not connect or sync your accounting software.
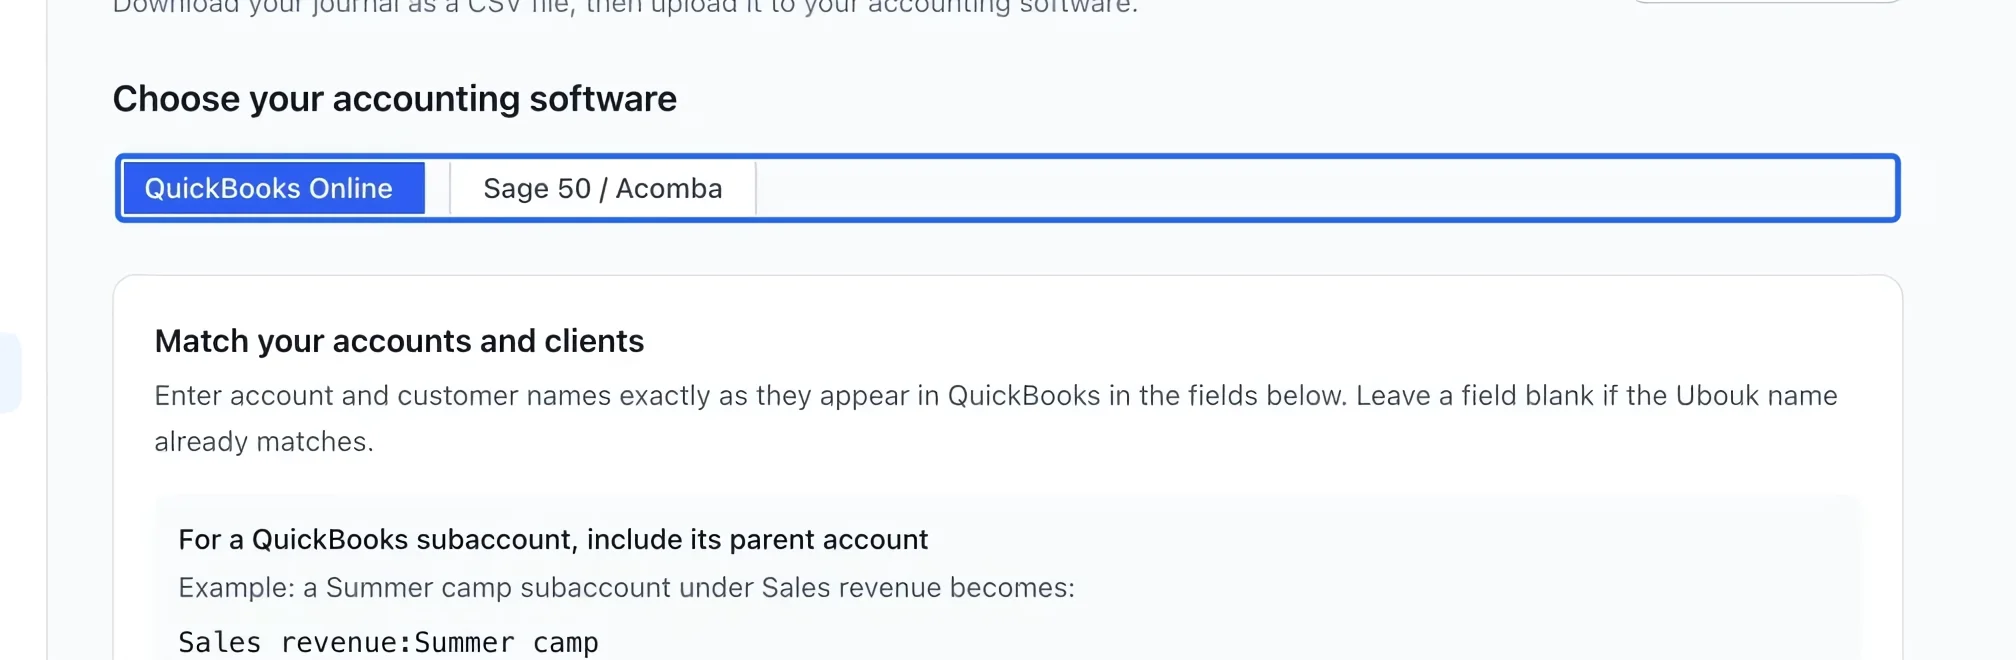
Select the screenshot to enlarge it. The blue outline marks the control to use.
- 2
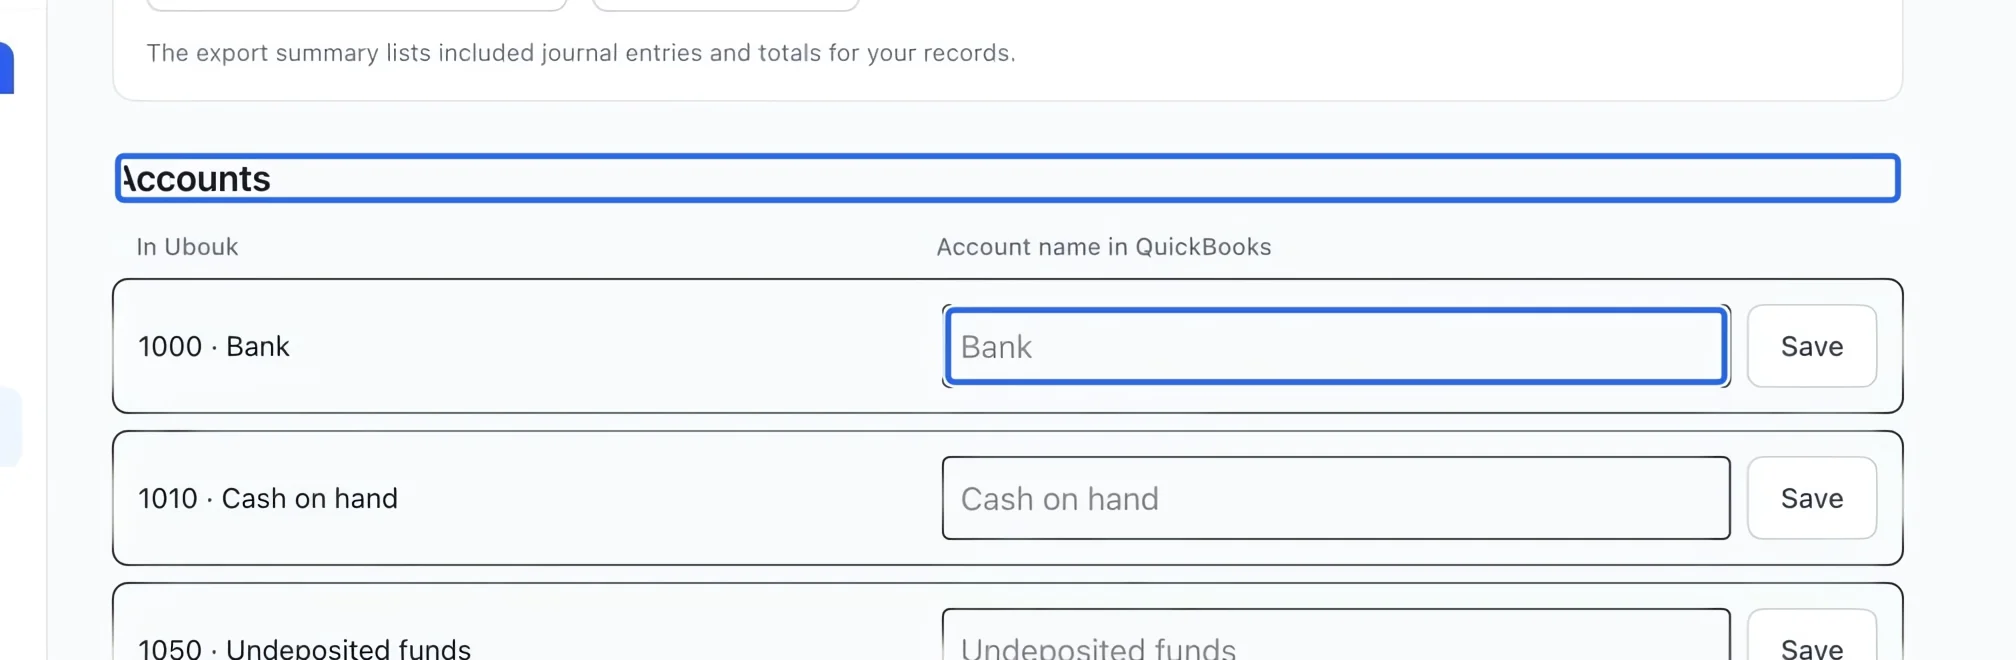
Match accounts and clients
Under Accounts and Clients, enter the exact names used by QuickBooks and save each row. Include the parent for a subaccount, for example Sales revenue:Summer camp. Blank fields use Ubouk names. Under Sage/Acomba, use account numbers and the client names or codes expected by your import tool; blank accounts use Ubouk numbers.
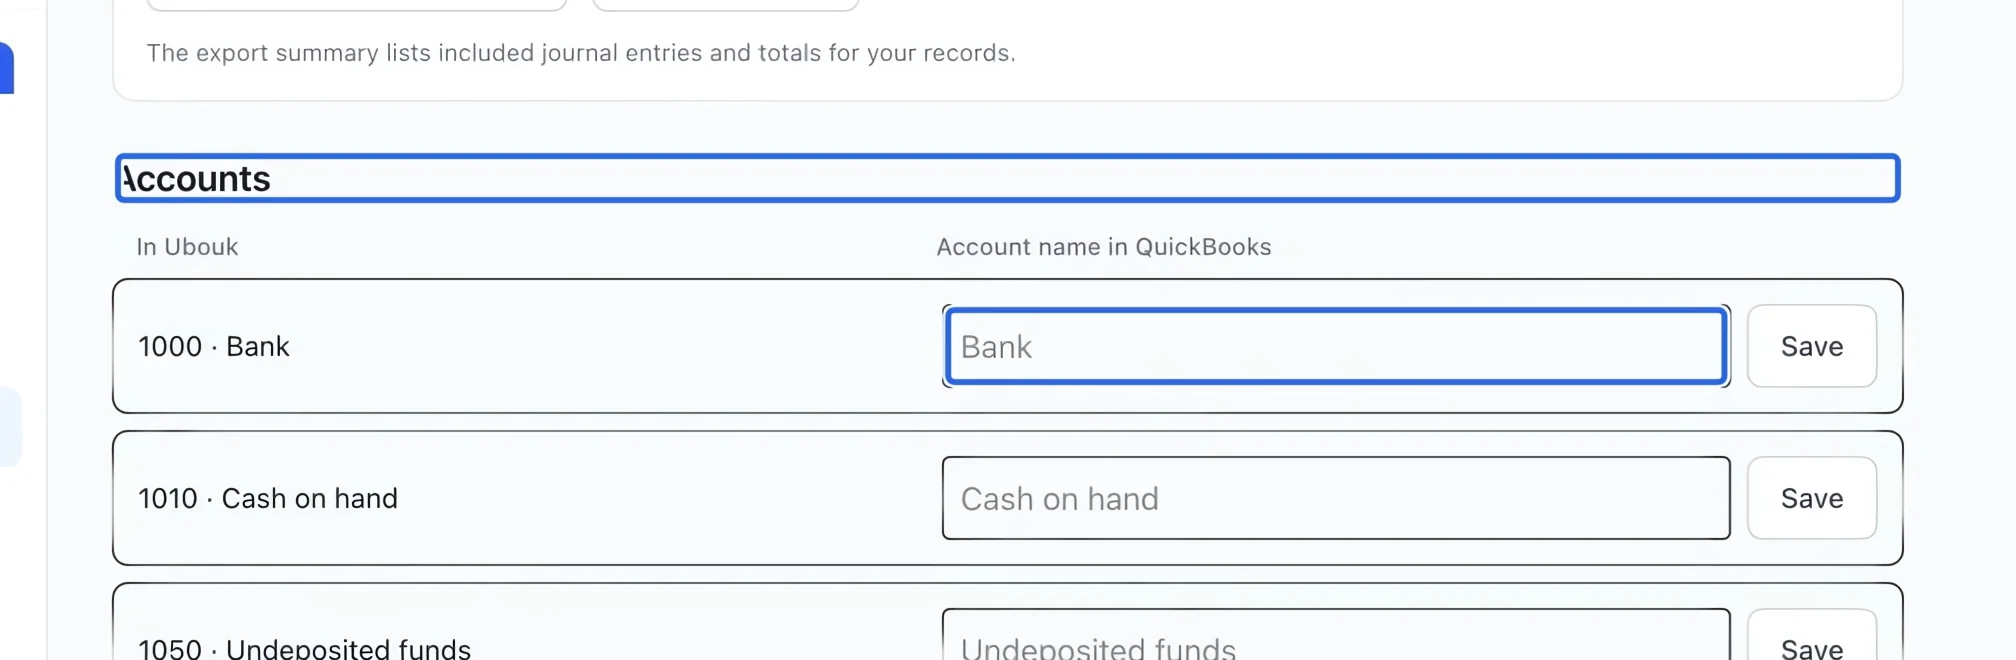
Select the screenshot to enlarge it. The blue outline marks the control to use.
- 3
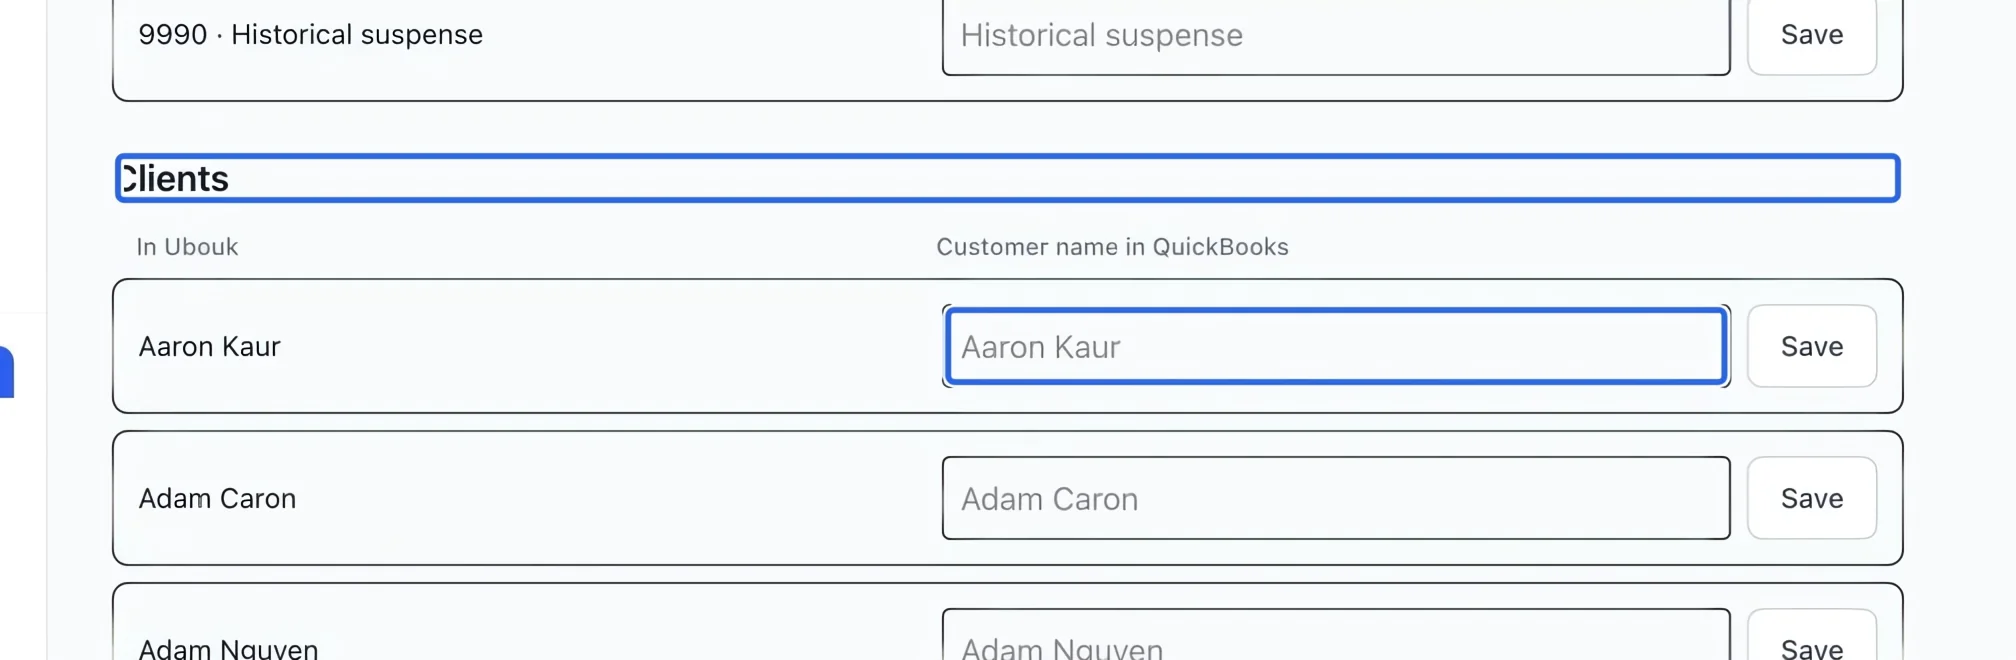
Match the customer names
Under Clients, enter each customer name exactly as it appears in the selected accounting software, then save its row. Blank fields use the client name in Ubouk. Match the account holder who is billed, rather than the participant’s name. Account and client mappings are saved separately for each export profile.
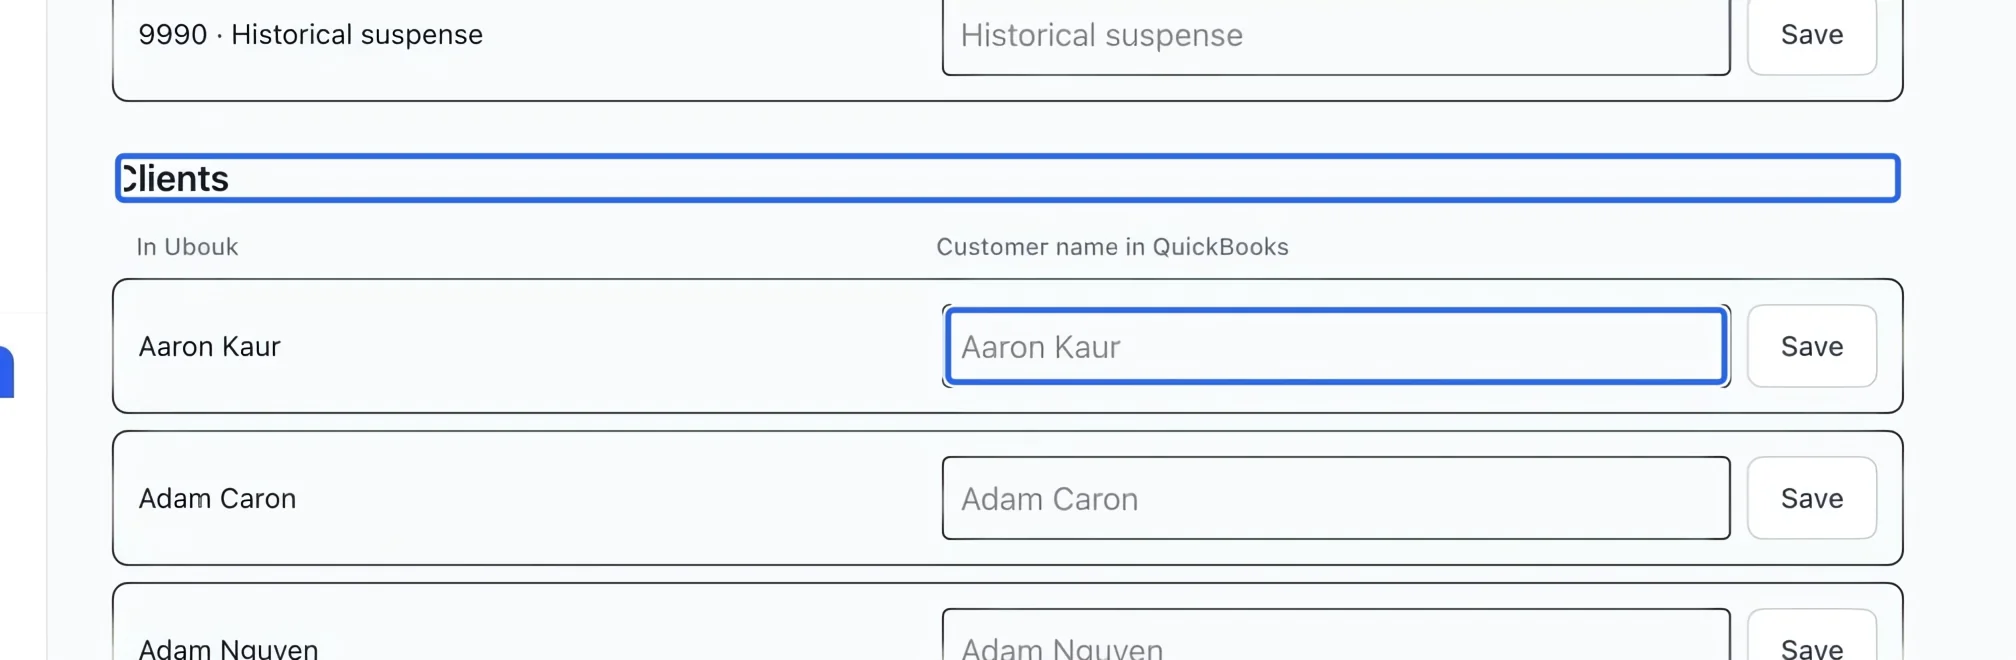
Select the screenshot to enlarge it. The blue outline marks the control to use.
- 4
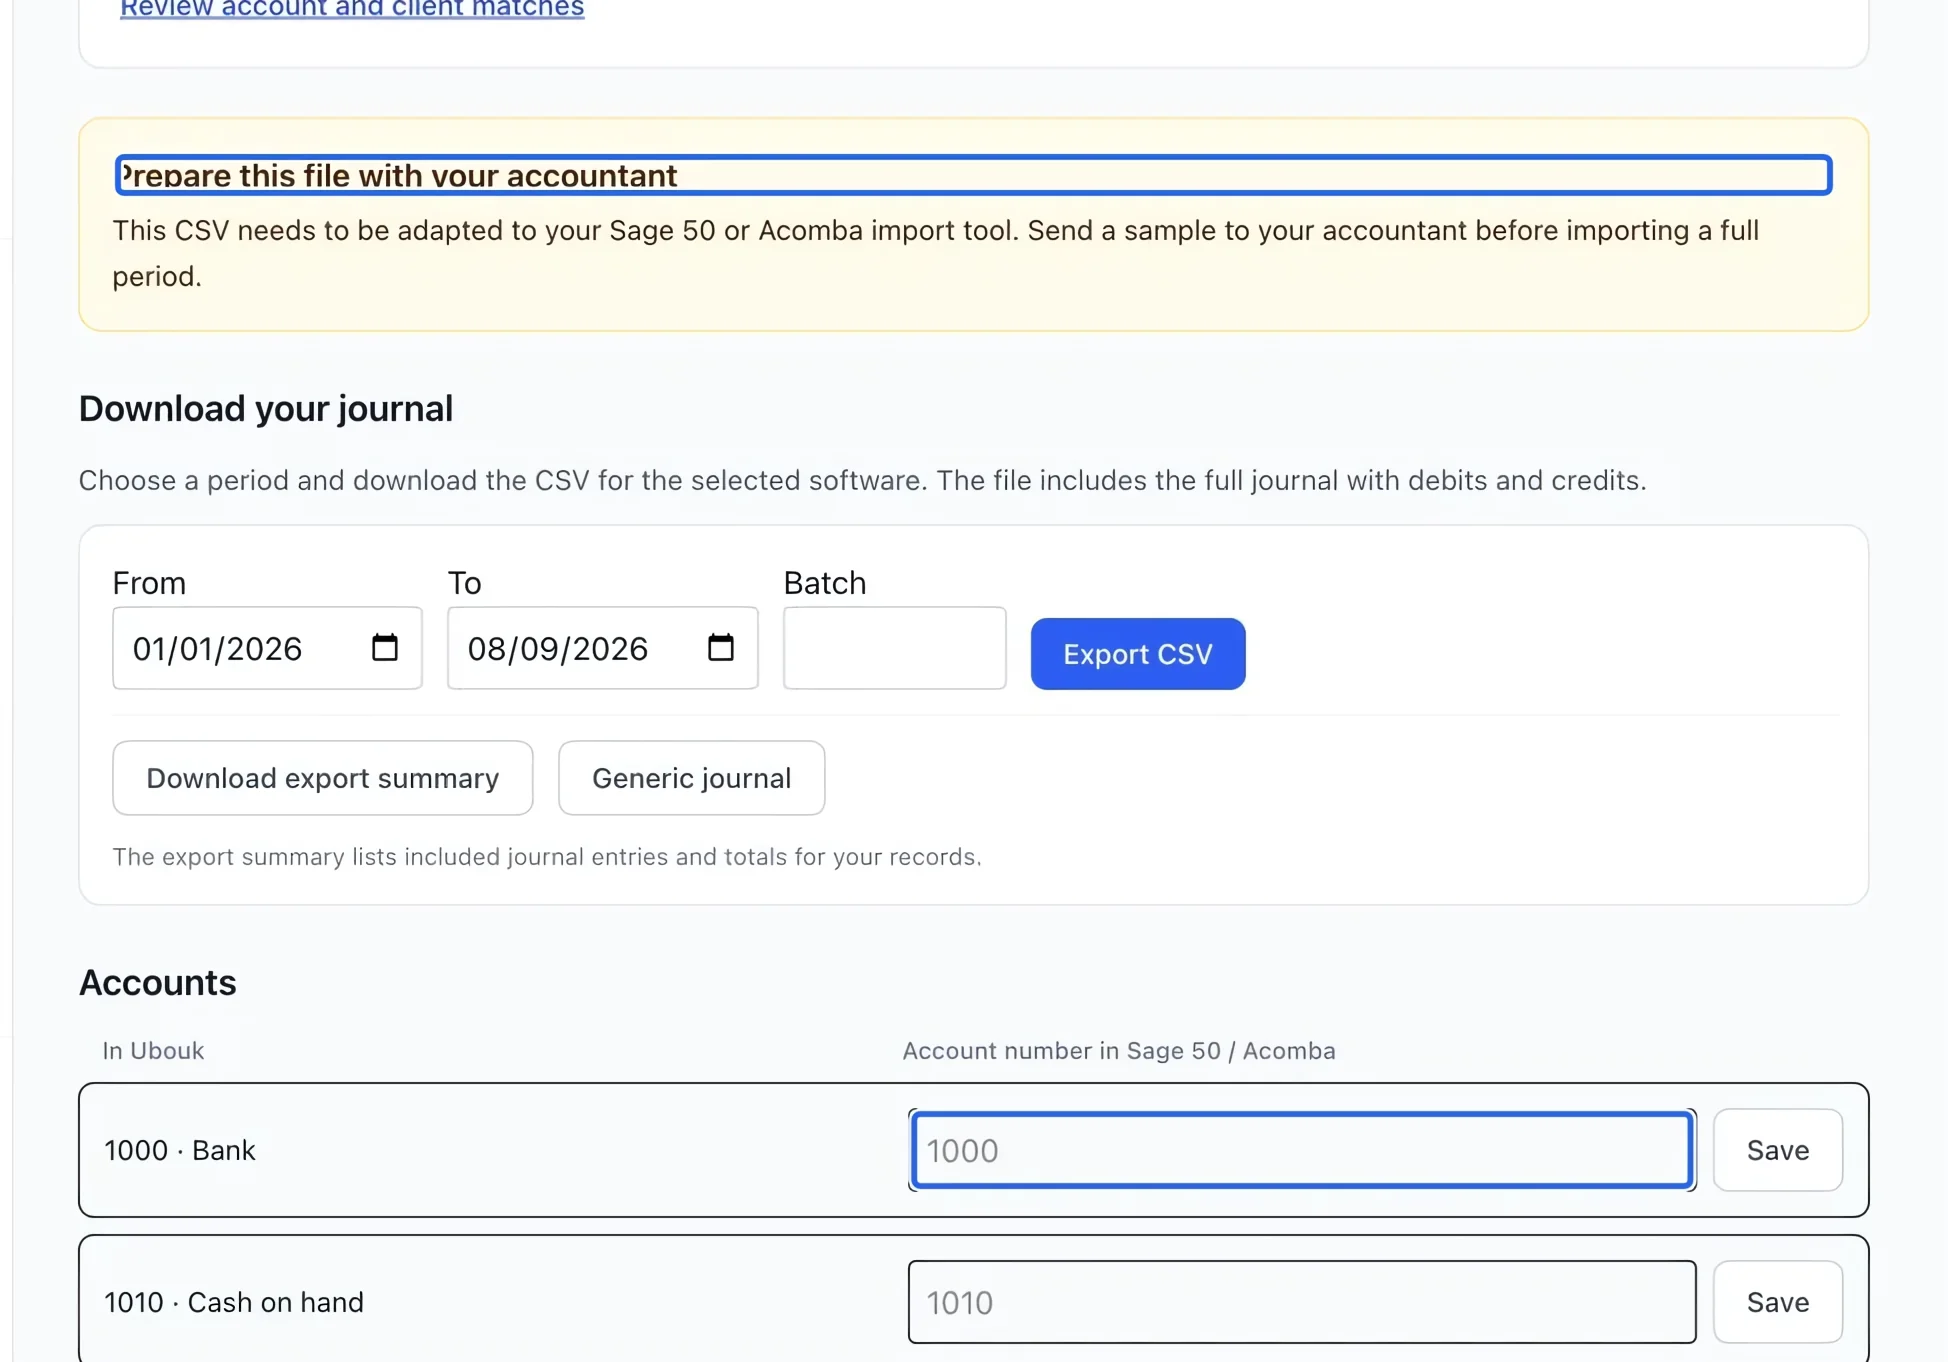
Prepare the Sage or Acomba format
Select Sage 50 / Acomba to edit its own mappings. Enter external account numbers and customer names or codes, then save each row. A blank account uses its Ubouk number. Confirm the required columns and conversion with your accountant: this CSV must be adapted to the destination import tool.
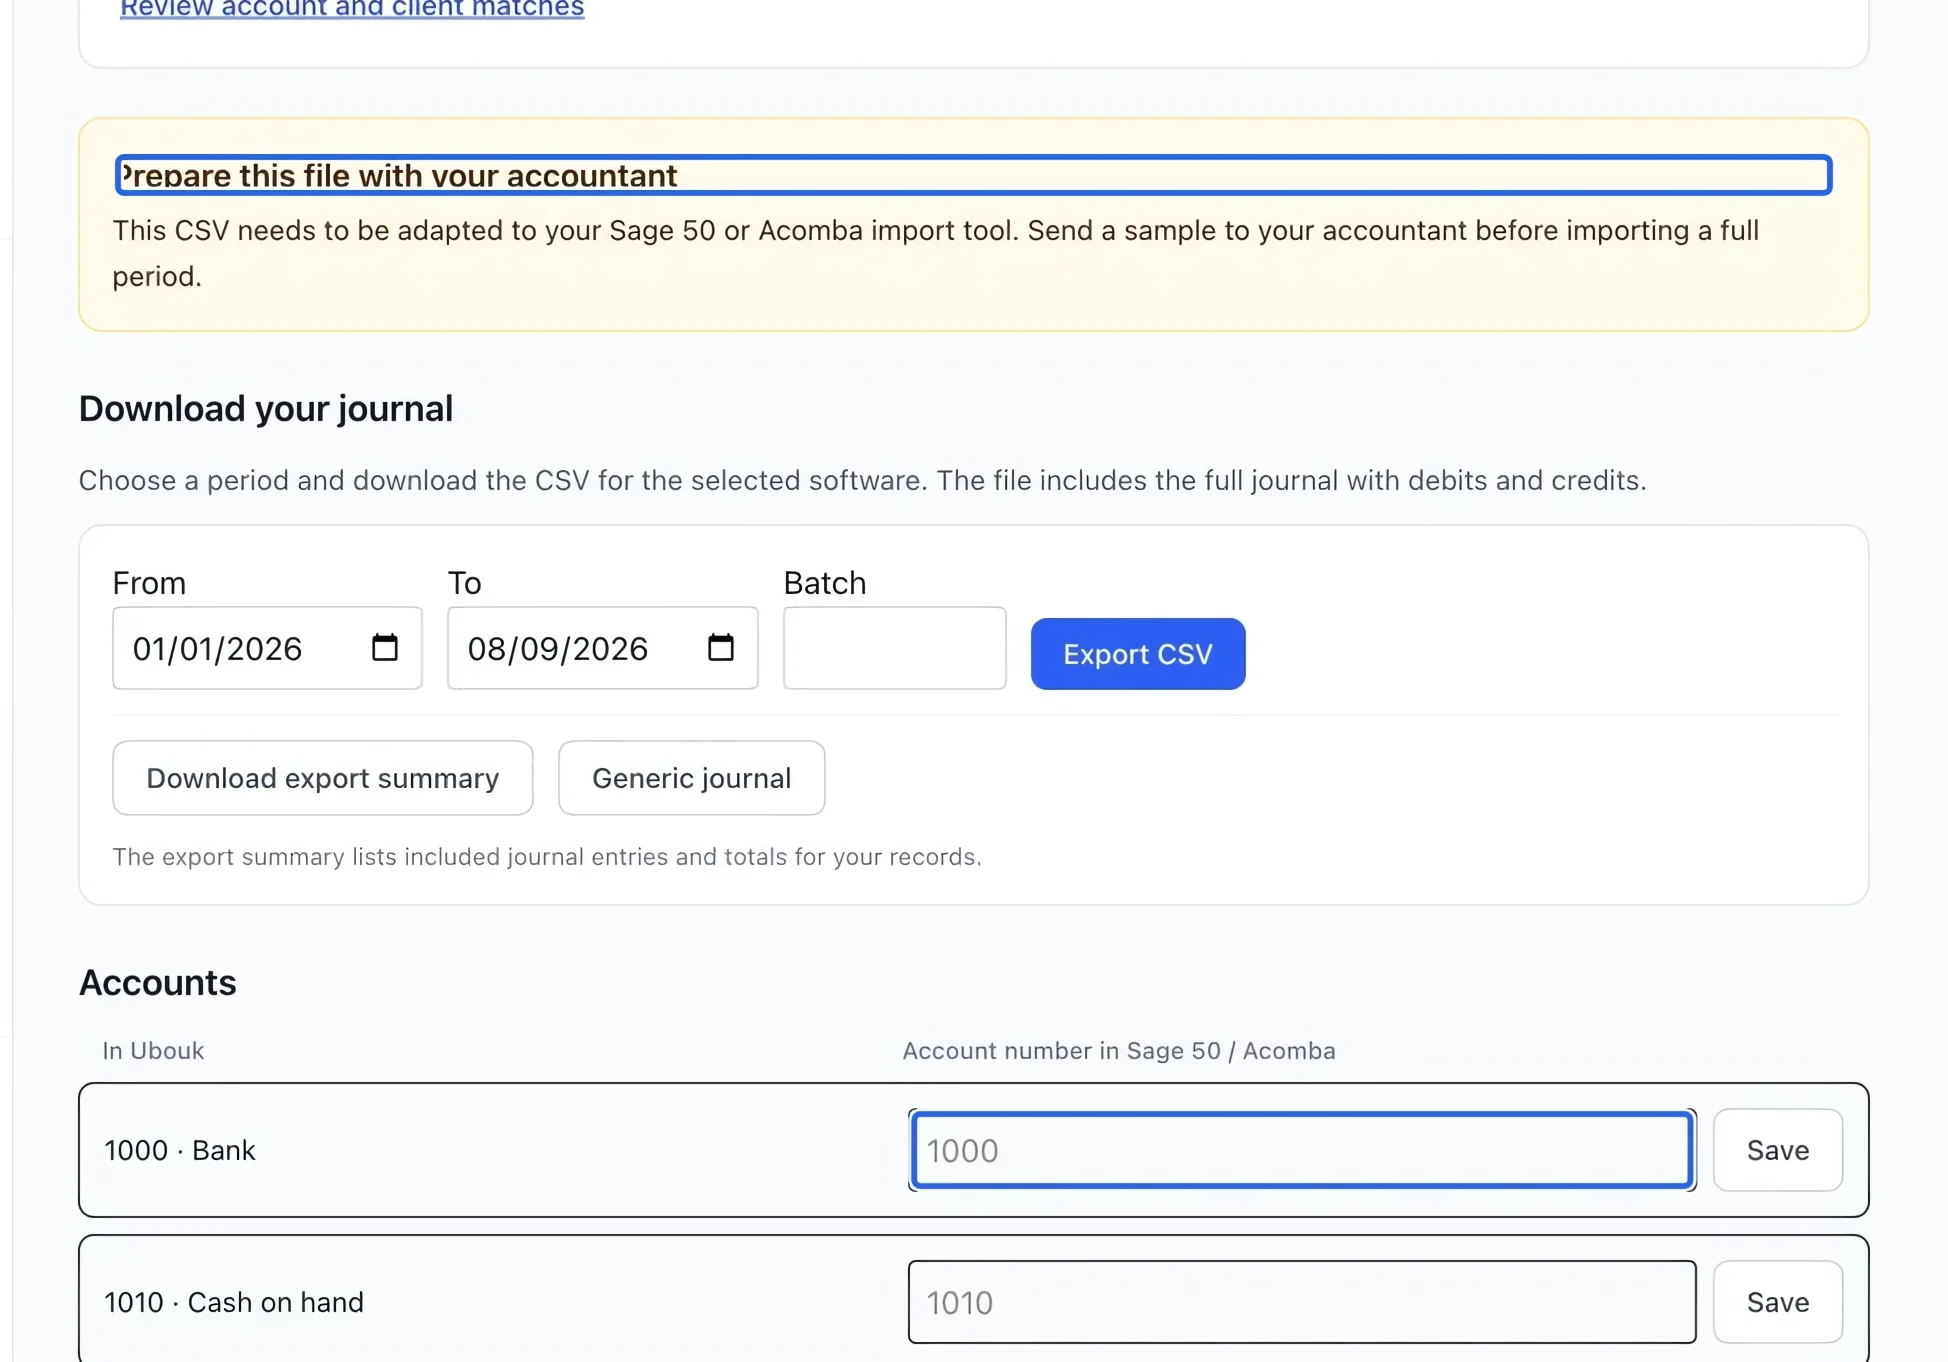
Select the screenshot to enlarge it. The blue outline marks the control to use.
- 5
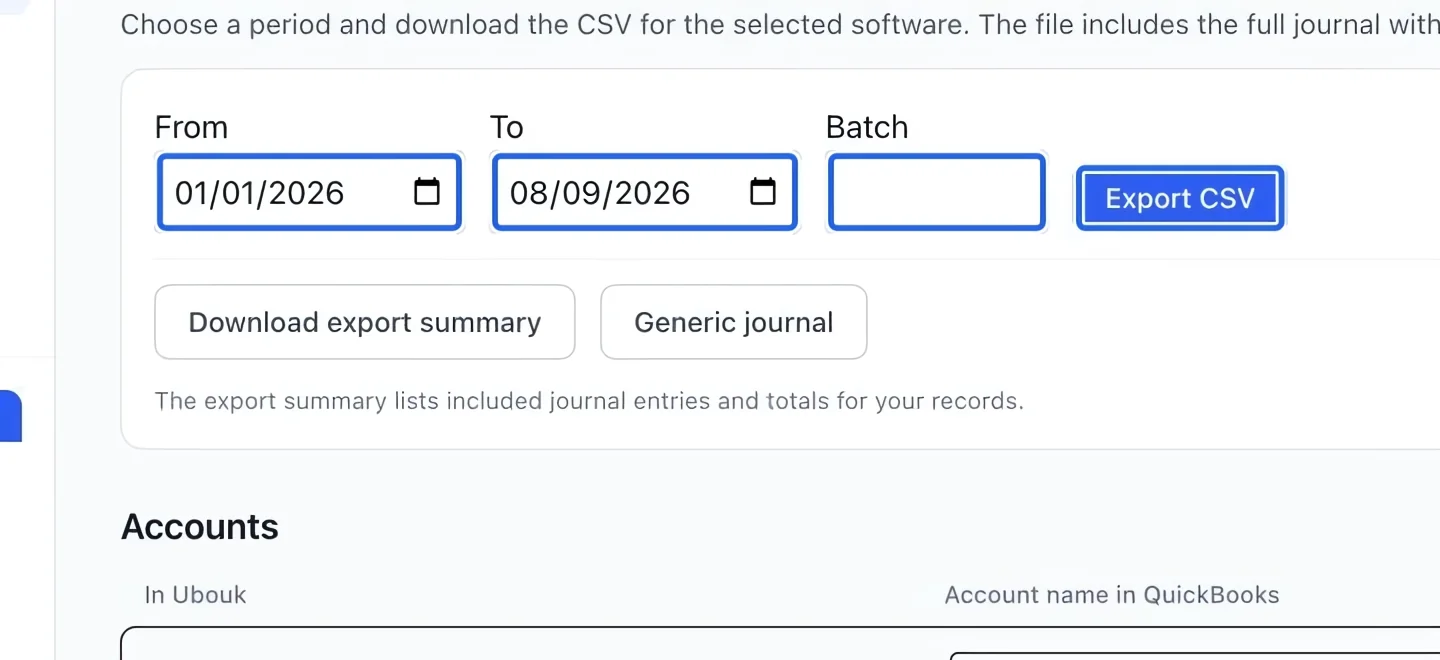
Choose the period and download
Set From and To, and optionally a Batch number. Click Export CSV for the selected software or Generic journal for the standard format. The export contains the full journal with debits and credits. It is independent of the cash or accrual presentation used by sales reports.
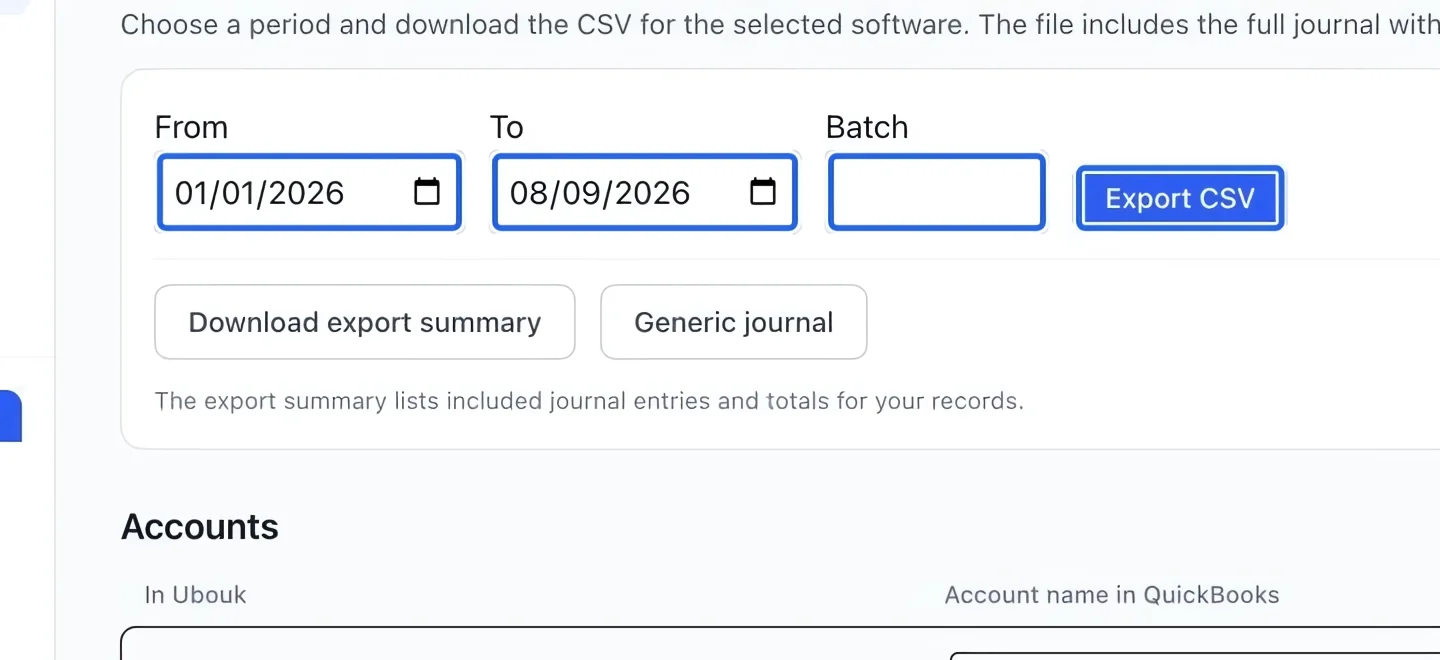
Select the screenshot to enlarge it. The blue outline marks the control to use.
- 6
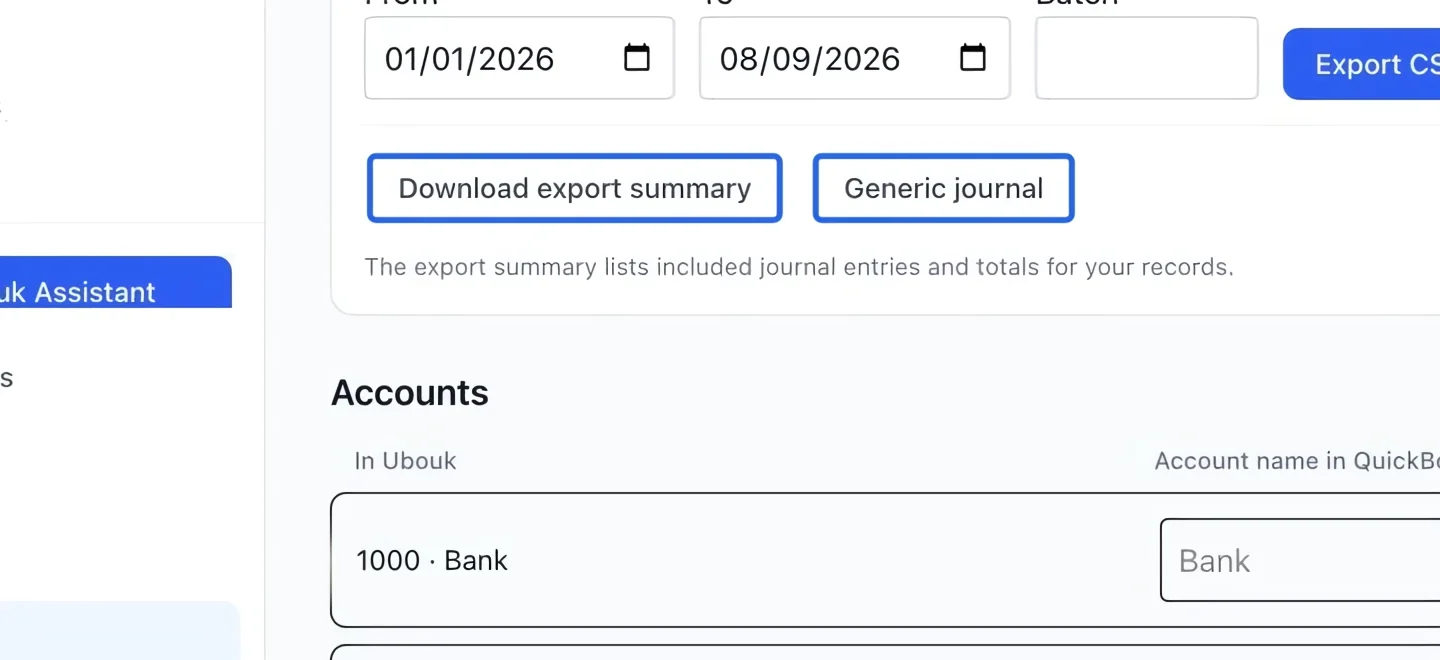
Keep an export summary
Click Download export summary using the same dates and batch. Keep this file with the CSV: it lists the included entries and totals. Track which periods and entries have already been imported so overlapping exports do not duplicate entries in your accounting software.
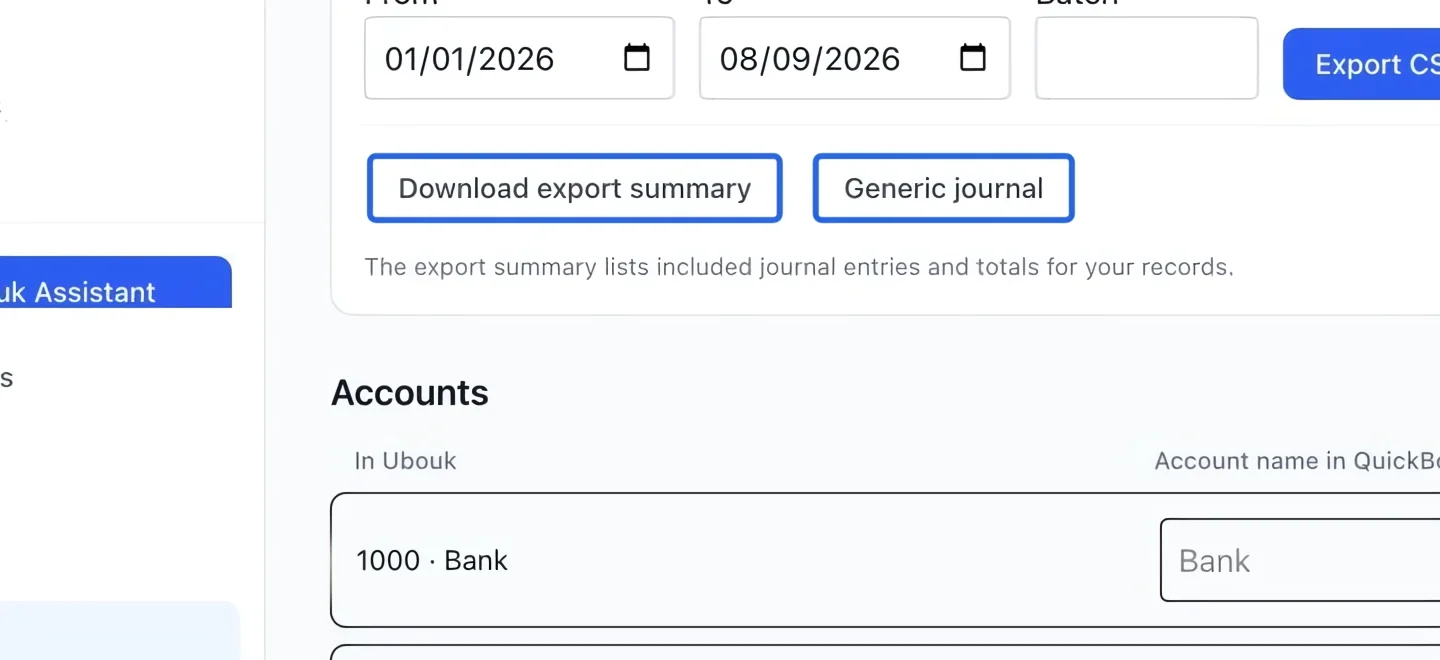
Select the screenshot to enlarge it. The blue outline marks the control to use.
- 7
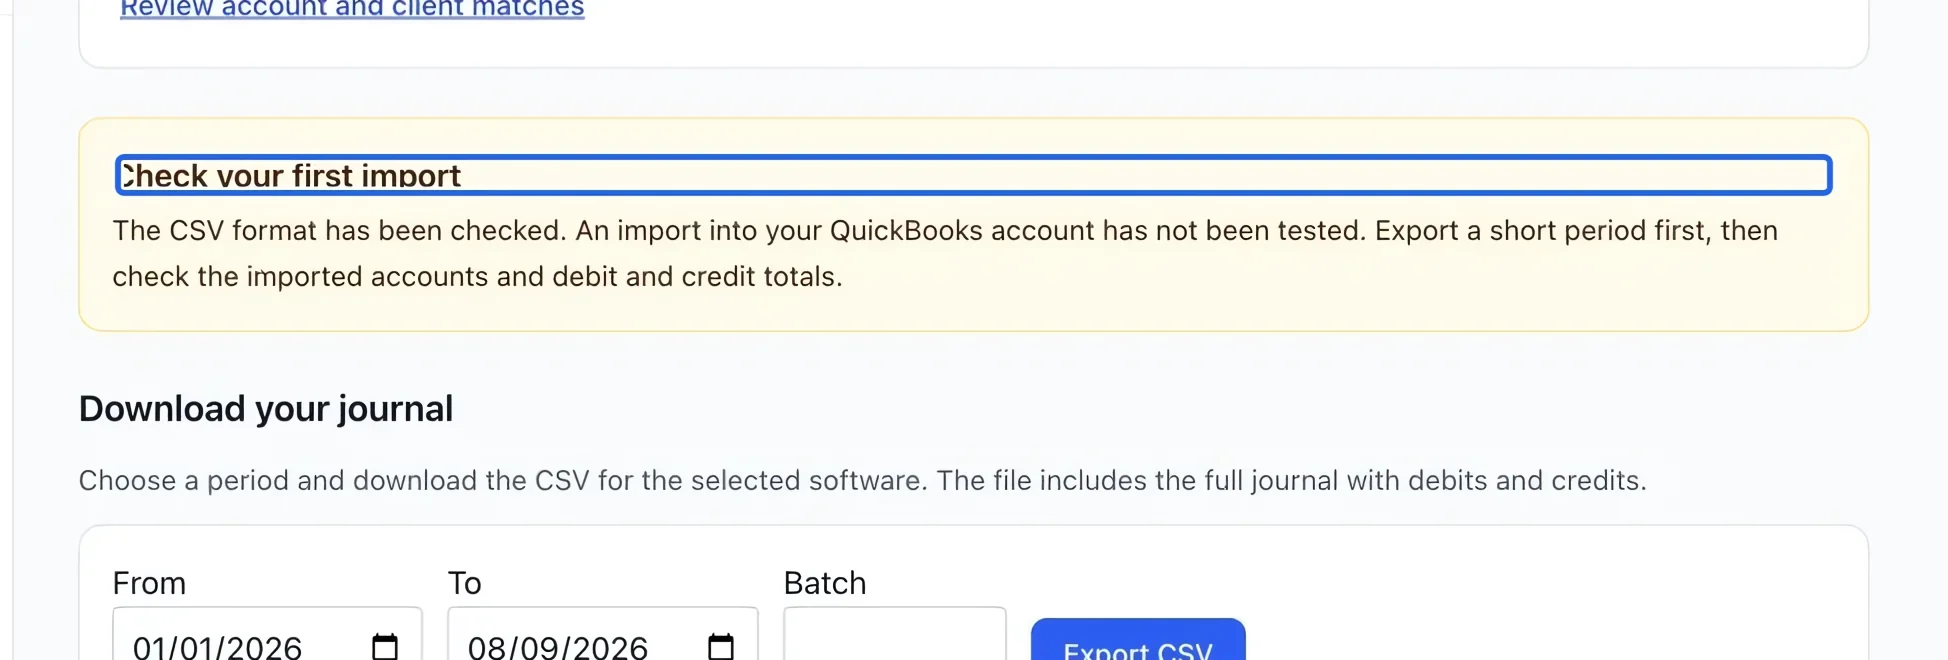
Validate a short first import
Export a short period first and check the destination accounts, client matches, and debit and credit totals after import. The QuickBooks CSV has been checked locally; import into your account still needs validation. Sage 50 / Acomba requires adaptation to your import tool with your accountant.
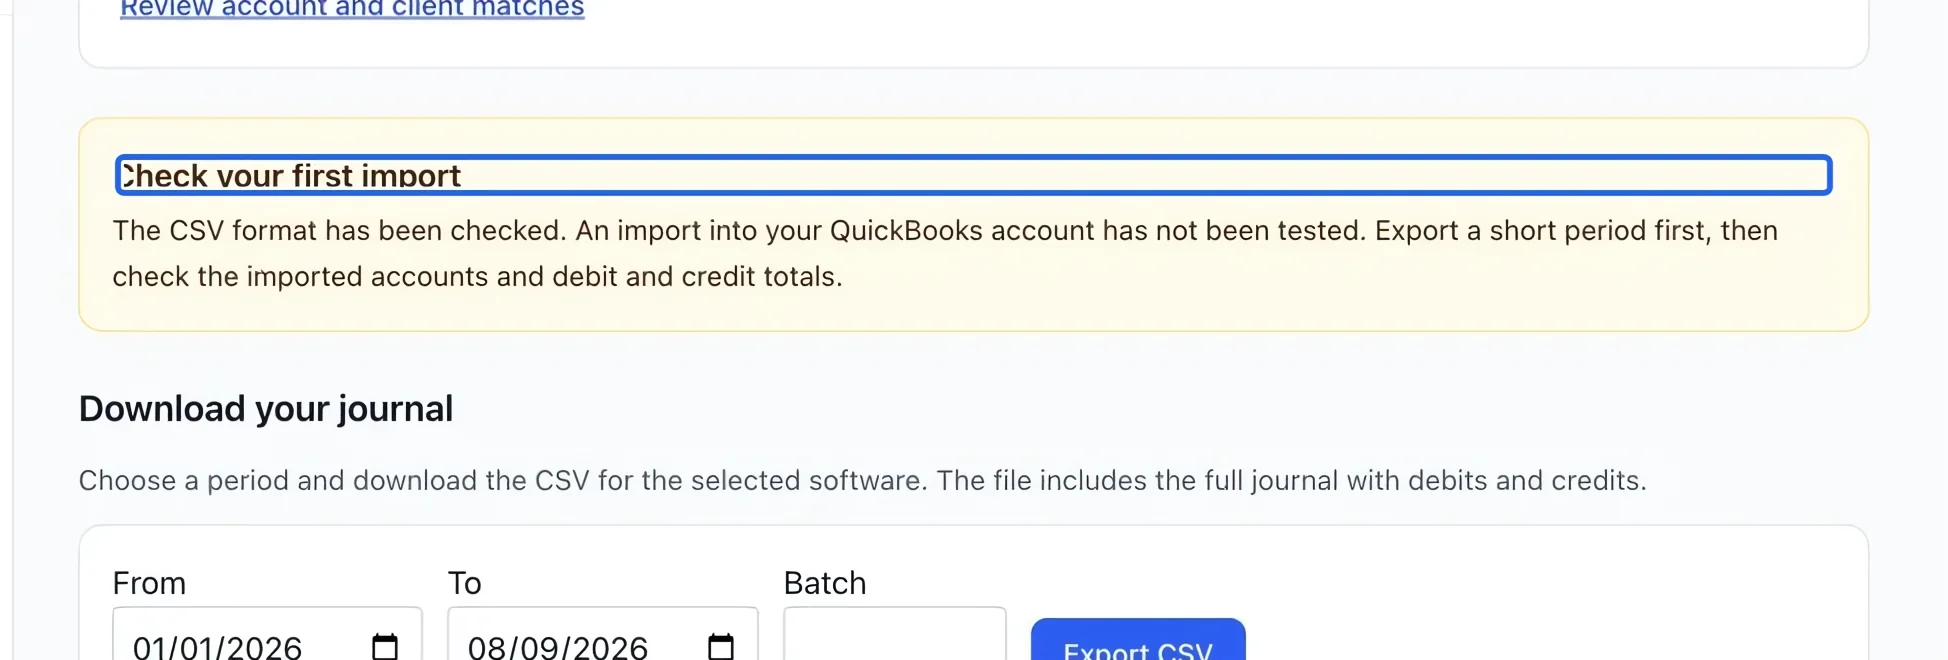
Select the screenshot to enlarge it. The blue outline marks the control to use.
Keep going
Choose your accounting basis, add accounts, and maintain the accounts used by your financial reports.
Accounting & financial reportsReview open totals, close batches manually or on a schedule, and track verified payout lots.
Accounting & financial reportsTrace sealed entries affecting receivables using accounts, references, debits and credits.