Capture leads with forms and QR codes
Newsletter signup forms for your portal, and trackable QR codes for gym posters and flyers.
- 1
Create a lead form
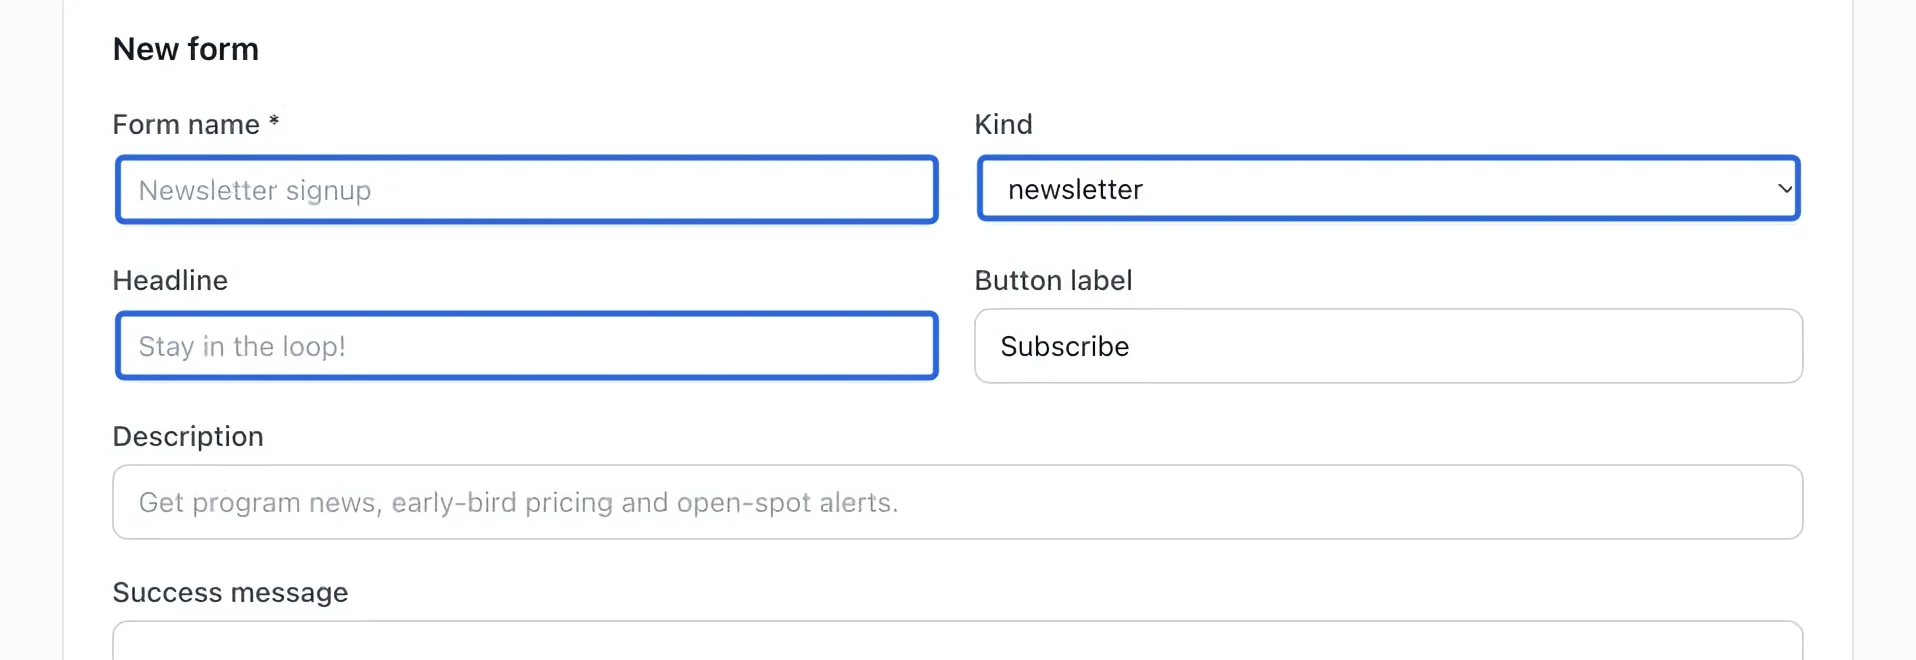
Open Marketing → Growth → Forms. In New form, enter a name, choose the kind, and write a headline explaining what the visitor signs up for.
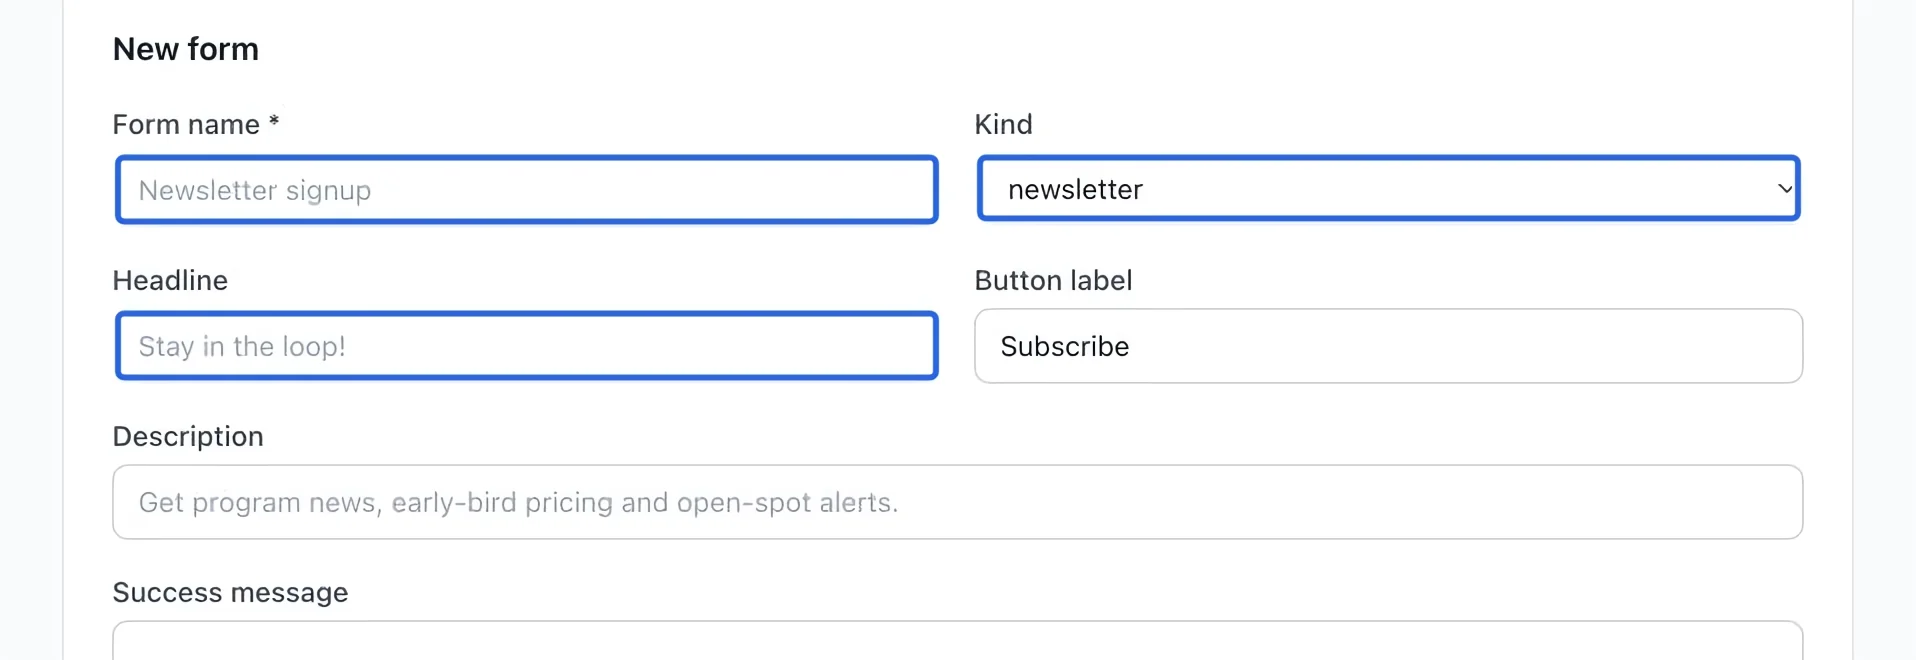
Select the screenshot to enlarge it. The blue outline marks the control to use.
- 2
Write the form messages
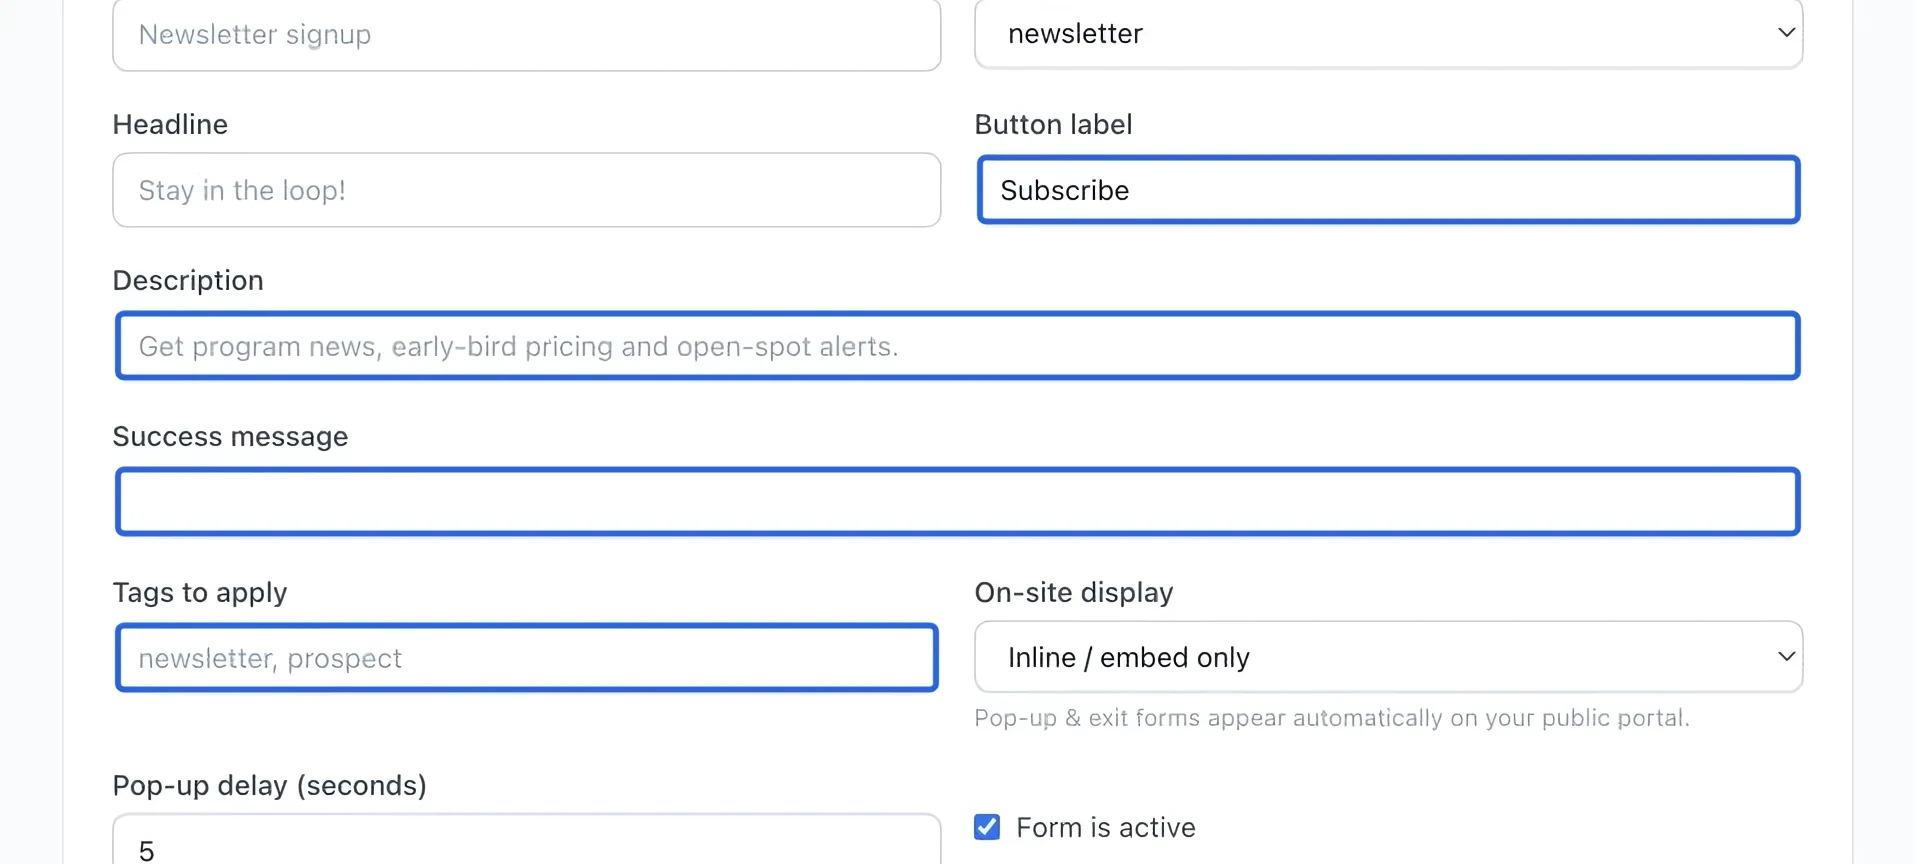
Set the button label, description and success message. Add tags to organize incoming contacts. Make the purpose clear so visitors know what messages to expect.
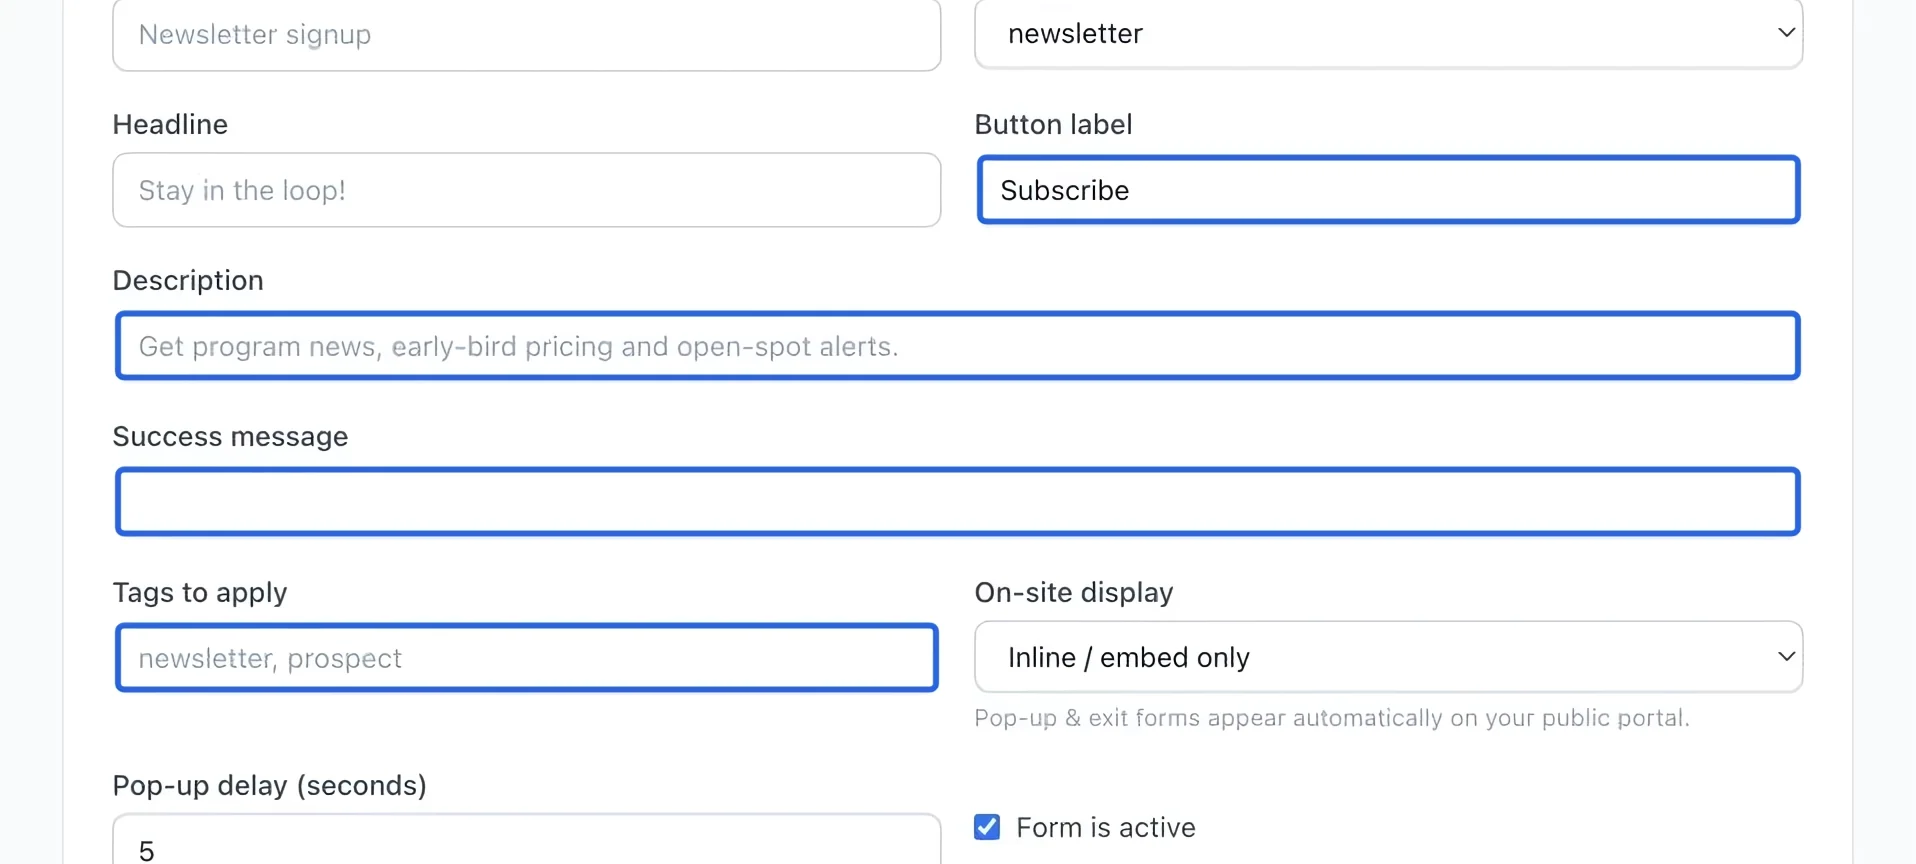
Select the screenshot to enlarge it. The blue outline marks the control to use.
- 3
Choose display and save
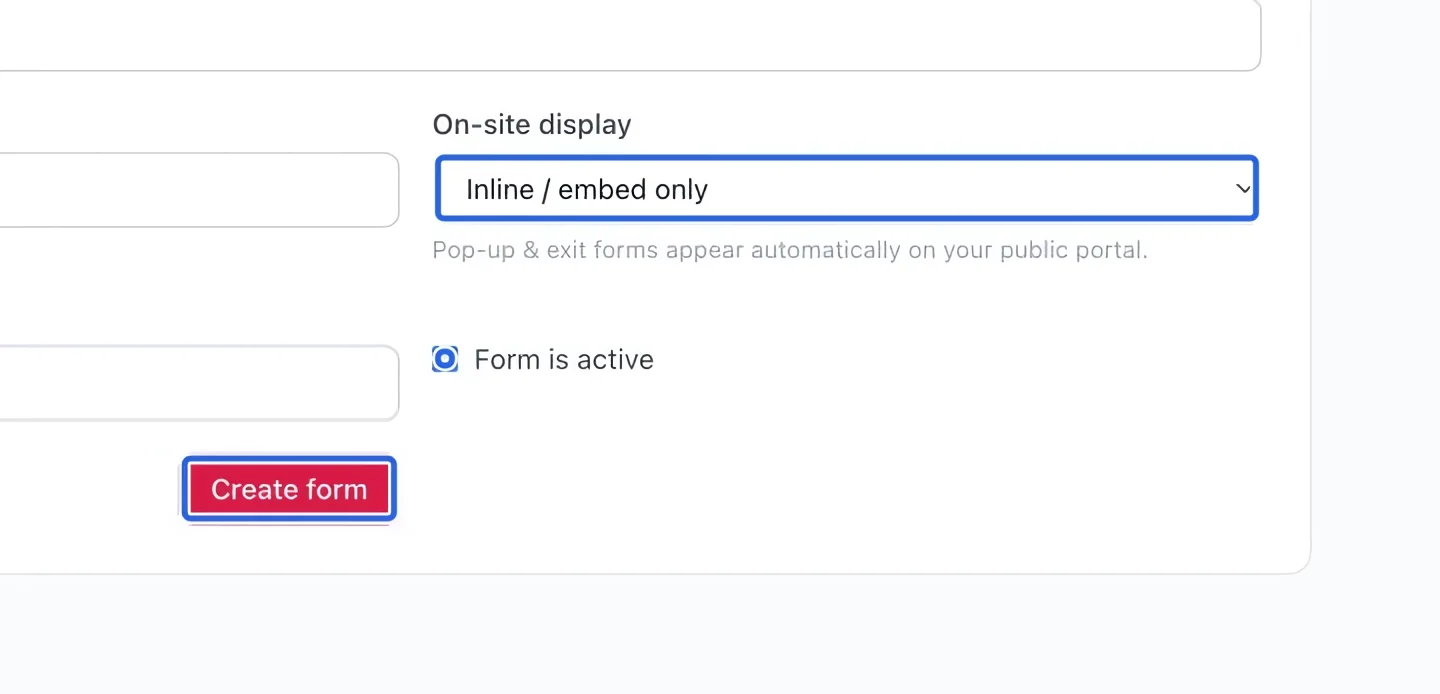
Choose the display mode, check whether the form should be active, then click Create form. Use the saved form’s Share & embed section to obtain its link or embedding instructions.
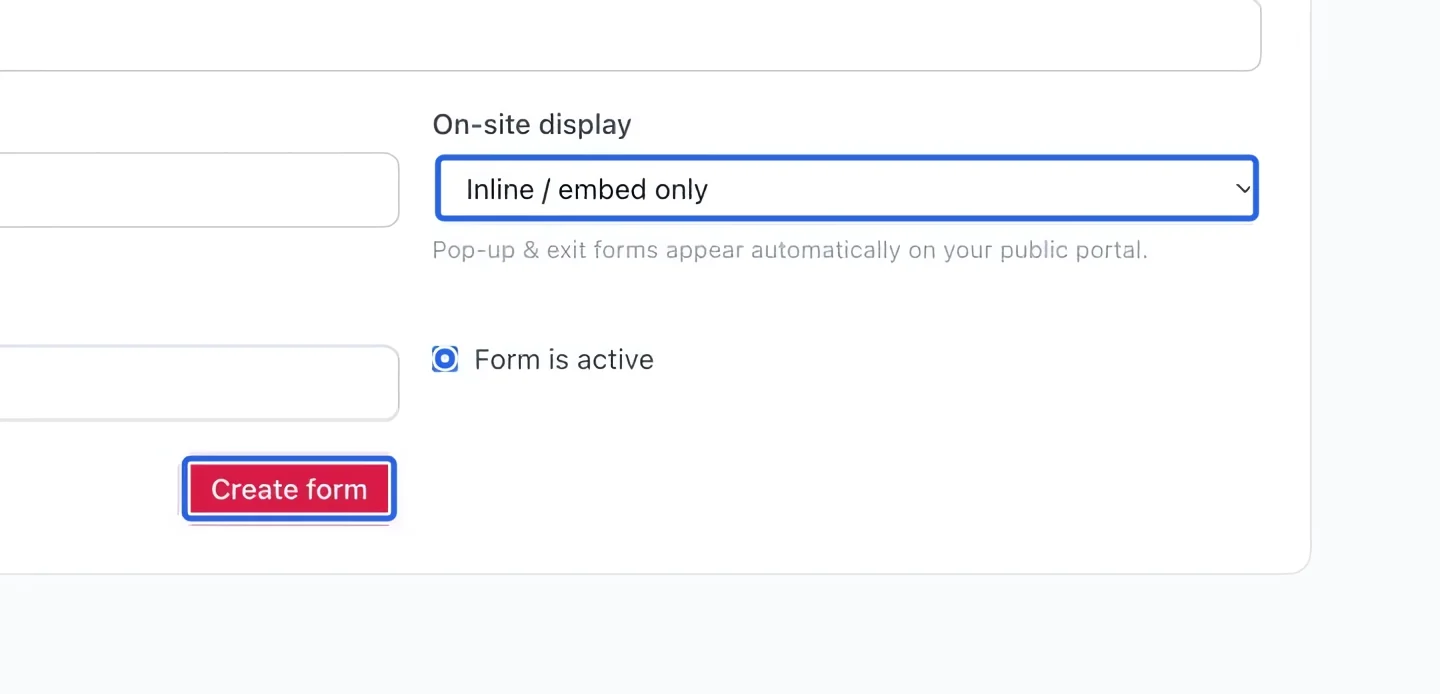
Select the screenshot to enlarge it. The blue outline marks the control to use.
- 4
Prepare a trackable QR link
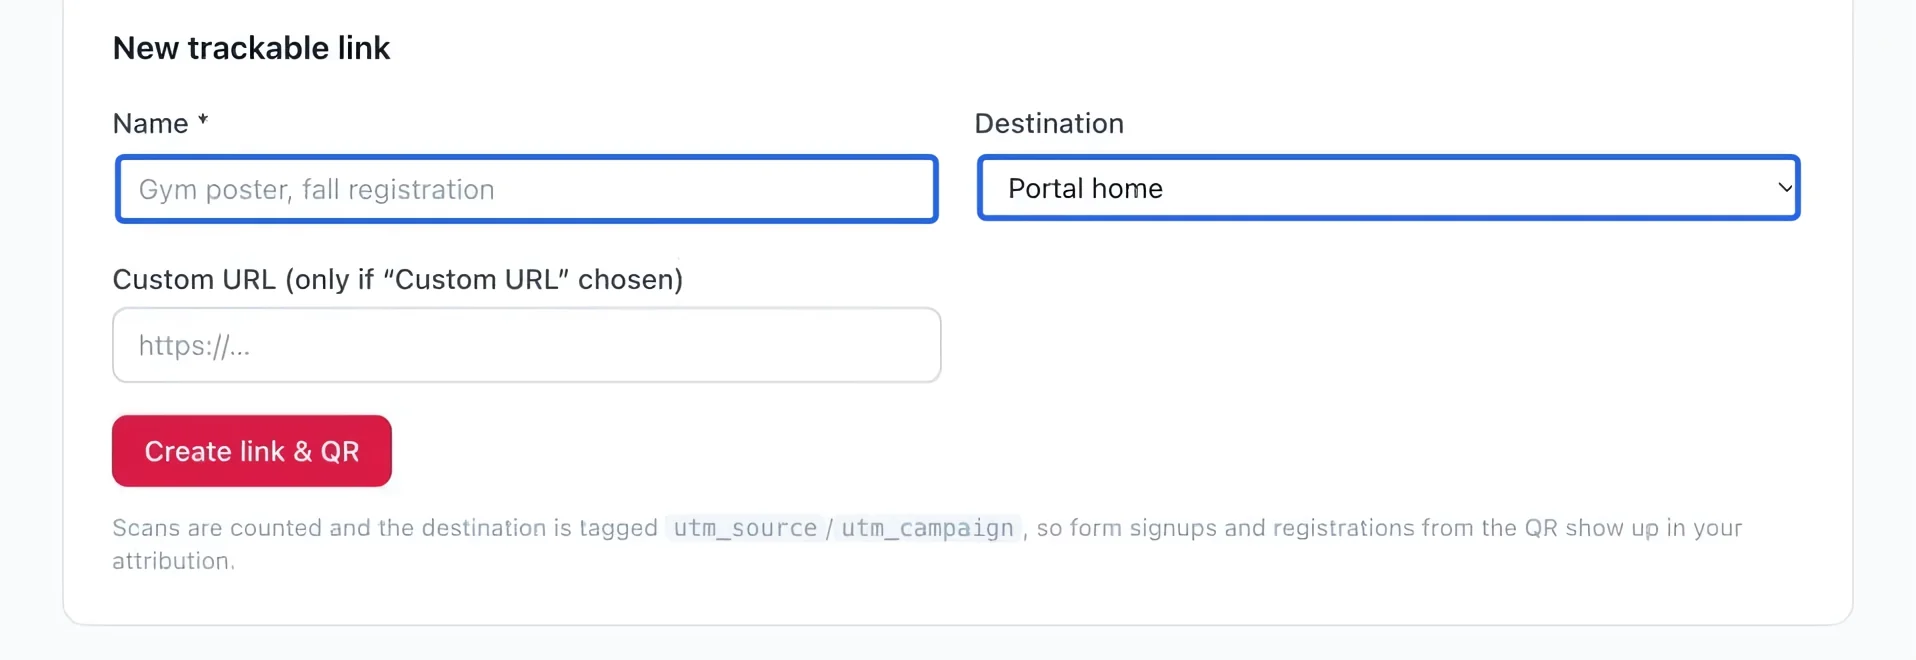
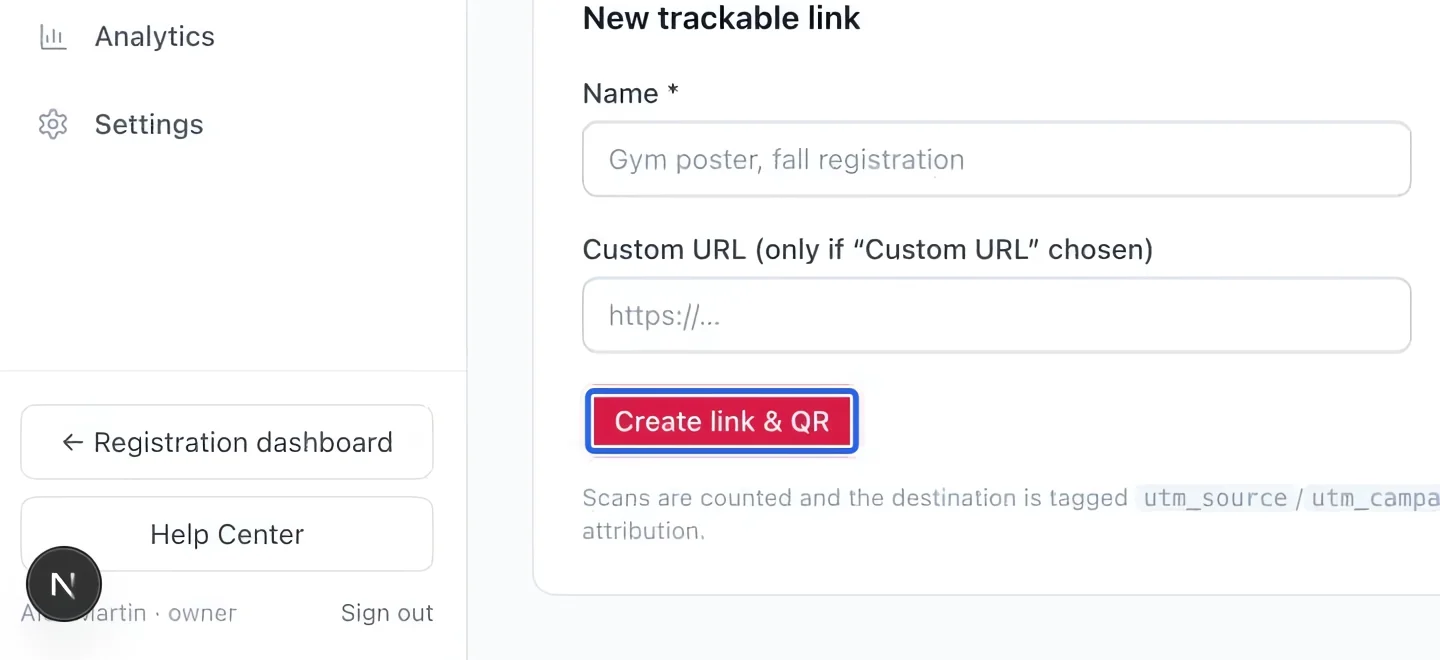
Open Growth → QR code. Enter a descriptive link name, such as “Gym poster”, and select the destination form or program. Use a distinct name for each physical location you want to measure.
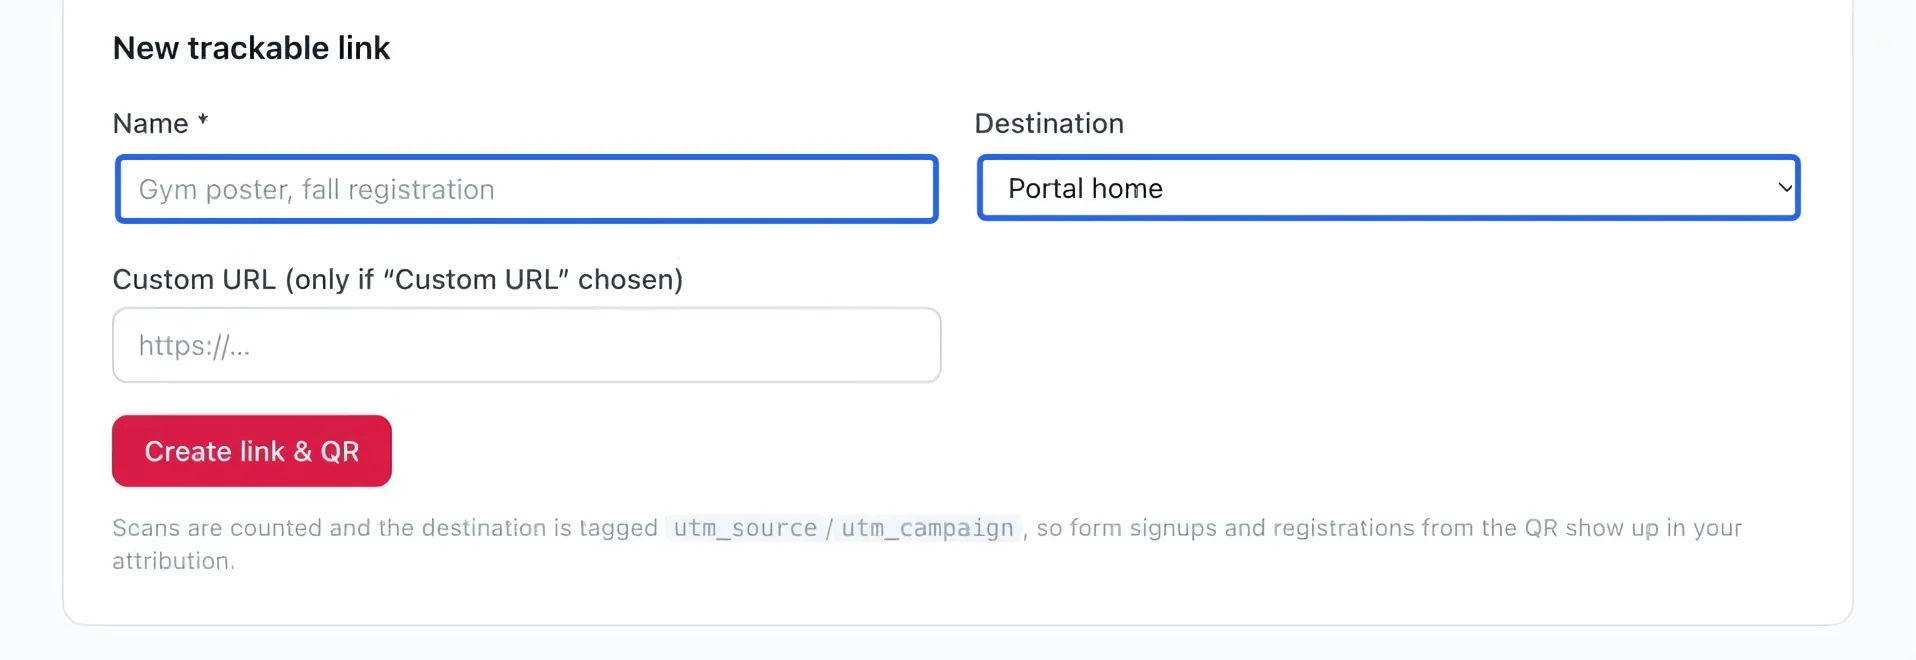
Select the screenshot to enlarge it. The blue outline marks the control to use.
- 5
Create and test the QR code
Click Create link & QR. Open or scan the generated code with your phone and confirm it reaches the intended page before printing. Review scan counts in the saved-link list later.
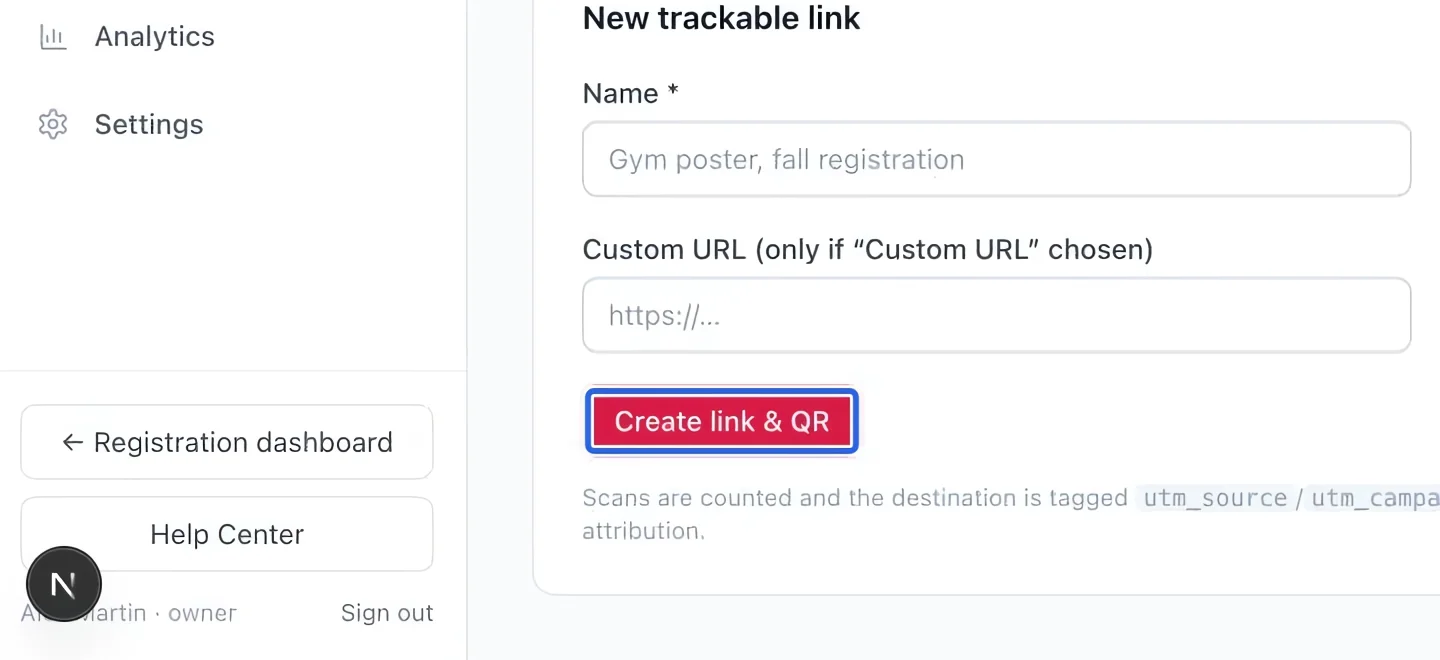
Select the screenshot to enlarge it. The blue outline marks the control to use.